


When creating my own rendering variants in SXA, I was often frustrated by the rigidity of the elements available to create the variant’s HTML structure. For example, it was nearly impossible to render easily the value of a Droplist or taking care of rendering parameters. To create complex rendering variants, with CSS classes defined in rendering parameters resulted in an overuse of the rule definitions and, I must admin, duplicating a lot of items.
Now from Sitecore 9.3, we have access to a scripting item called “Scriban”, which can easily replace a part or the whole rendering variant for a component.
Scriban is easily extended, fast and powerful.
One easy example to begin with
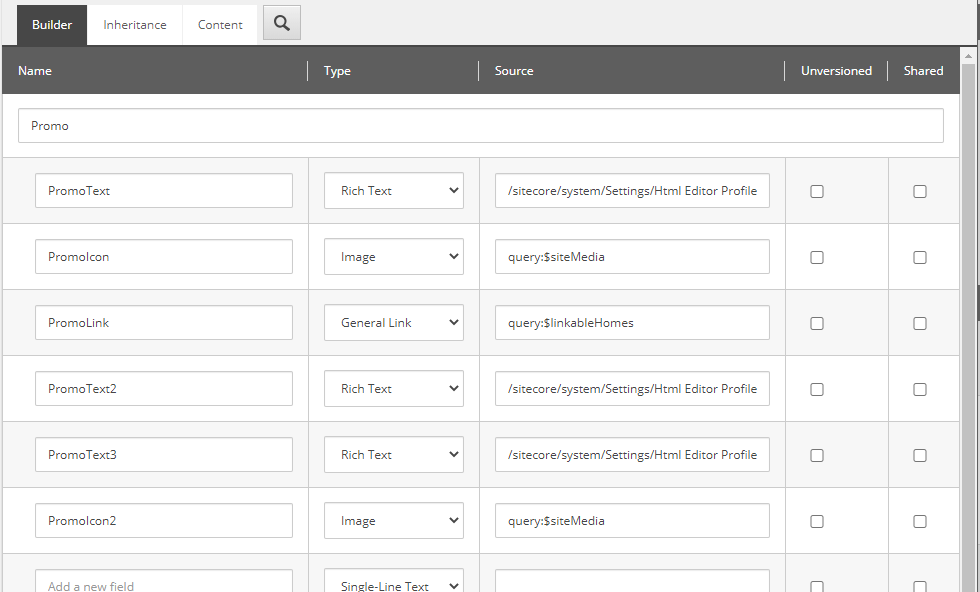
Our first example is to create a new variant rendering for the Promo item. The promo item contains 6 fields: Promotext, promoIcon, PromoLink, PromoText2, PromoText3 and PromoIcon2.
Its default rendering variant is also very simple, it renders the PromoIcon, PromoText and PromoLink and build a HTML structure with different variant fields and sections.

The HTML resultat for this structure is :
<div><img href="PromoIcon"/></div>
<div class="promo-text">
	<div>PromoText</div>
	<div><a href="PromoLink">PromoLinkText</a></div>
</div>
I want to create a rendering for my promo items, where I could see all 6 fields from the template. The resulting HTML should be as followed:
<div><img href="PromoIcon"/></div>
<div class="promo-text">
	<div>PromoText</div>
	<div><a href="PromoLink">PromoLinkText</a></div>
</div>
<div class="small-text">PromoText2</div>
<div class="new-icon"><img href="PromoIcon2"/></div>
<div class="footer">PromoText3</div>
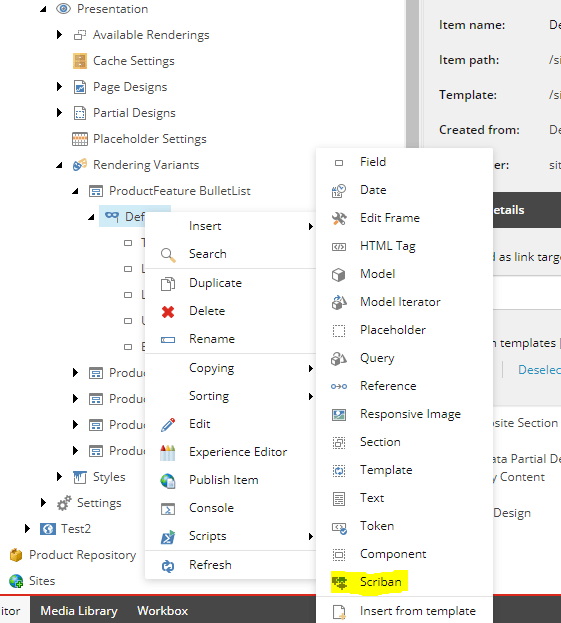
In order to do that, I create a new variant definition under /sitecore/content/{TENANTFOLDER}/{TENANT}/{SITE}/Presentation/Rendering Variants/Promo and I add just one element “Scriban” to this rendering definition:
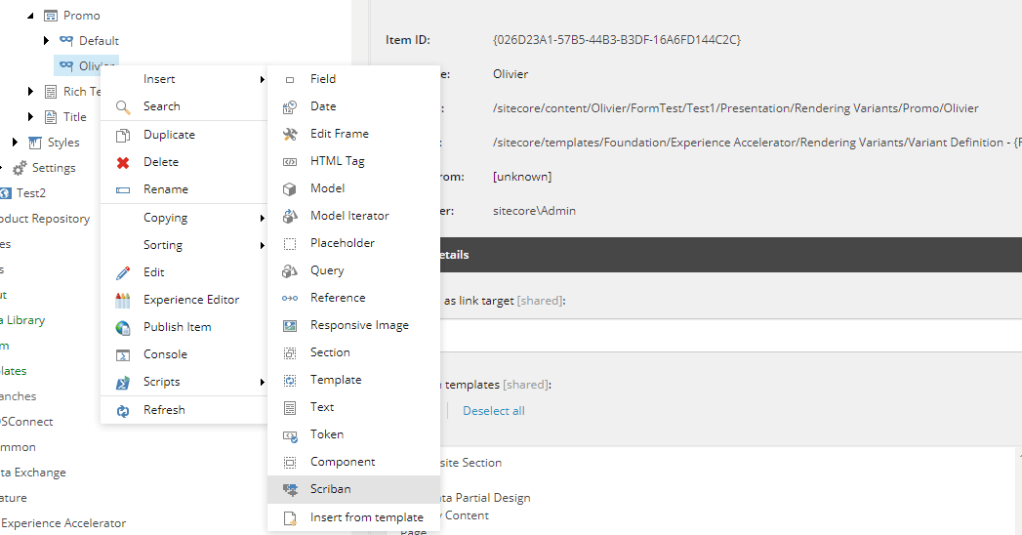
In this new item, under the field “Template”, I write the following code:
<div>{{ i_item.PromoIcon }}</div>
<div class="promo-text">
	<div>{{ i_item.PromoText }}</div>
	<div>{{ i_item.PromoLink }}</div>
</div>
<div class="small-text">{{ i_item.PromoText2 }}</div>
<div class="new-icon">{{ i_item.PromoIcon2 }}</div>
<div class="footer">{{ i_item.PromoText3 }}</div>
As you can see, the template follow the HTML structure, and every item field is rendered by just calling it, whether it is a text, a link or and image.
i_item is the current item, and we use the name of the field to retrieve it.
A more complex example
Writing a Scriban template was very easy and faster than using the variant definition items to create a HTML structure. We also have a good control of how the component’s HTML will look like.
Sitecore has extended scriban in order to get some Sitecore specific objects, items and functions in the script.
| Embedded item | Type | Value |
|---|---|---|
| i_home | Sitecore.Data.Items.Item | Home page item of the site for which the rendering process is performed. |
| i_datasource | Sitecore.Data.Items.Item | The item that was specified as the data source for the component. |
| i_item | Sitecore.Data.Items.Item | The current item within the rendering variant context. Often, this is an equivalent to the i_datasource.If your Scriban template was embedded within a Query or Reference rendering variant field, i_item will be exactly the item that other rendering variant fields would use for their rendering process. |
| i_site | Sitecore.Data.Items.Item | The root item of your site. In most cases, this item is the parent of your home page. |
| i_page | Sitecore.Data.Items.Item | The item that represents the page that is currently rendered. |
| Context object | Type | Value |
|---|---|---|
| o_language | Language | The language of the current page. |
| o_model | Object | The model that is passed to your MVC Controller rendering |
| o_geospatial | Sitecore.XA.Foundation.Search.Models.Geospatial | Location information for the currently rendered item with geospatial properties. |
| o_context | Sitecore.XA.Foundation.Abstractions.IContext | Context information for the currently rendered page. |
| o_pagemode | Sitecore.XA.Foundation.Abstractions.IPageMode | Context information for the currently rendered page. |
Sitecore has also created some specific functions, some of them are listed below. More information about those functions are available in the Sitecore documentation
| sc_decorate | Returns component decoration with styles, grid classes, and attributes required by Creative Exchange. |
| sc_editframe sc_editendframe | Renders the edit frame around an area of HTML and lets you specify a set of Experience buttons that help users edit the content within that area. |
| sc_placeholder | Renders a dynamic placeholder with optional context switch. |
| sc_execute | Executes a rendering variant field located beneath the Scriban template. |
| sc_evaluate | Evaluates the rendering variant rule stored beneath the Scriban template and returns the evaluated value (true or false) based on the result of the rule execution. |
| sc_raw | Retrieves the raw value of a field from an item. |
| sc_field | Renders a Sitecore field that allows fall back when a field is empty and allows you to add parameters to tags for, for example, images or links. |
| sc_parameter | Retrieves the rendering parameter values. |
Lets create a rendering variant for the Promo item, with the following extra specifications
- The user can change the background color of the whole component, thanks to a rendering parameter with a DropList of all available colors
- The user can have a border around the component thanks to a checkbox in the rendering parameters
- The picture PromoIcon2 can be placed on the left or the right of the text PromoText2, based on a choice made by the user in the rendering parameters.
- The picture PromoIcon will be placed in a background-image style in a div (just to show how to retrieve the URL of a media item)
In order to demonstrate Scriban, I want the resulting HTML to be slightly different based on the PromoIcon2 position.
(Image on the right, with borders)
<div class="BackgroundColor BorderClass" style="background-image: url(PromoIconUrl)">
<div class="promo-text">
	<div>PromoText</div>
	<div><a href="PromoLink">PromoLinkText</a></div>
</div>
</div>
<div class="small-text half">PromoText2</div>
<div class="new-icon half"><img href="PromoIcon2"/></div>
<div class="footer">PromoText3</div>
(Image on the left, without borders)
<div class="BackgroundColor NoBorderClass" style="background-image: url(PromoIconUrl)">
<div class="promo-text">
<div>PromoText</div>
<div><a href="PromoLink">PromoLinkText</a></div>
</div>
</div>
<div class="new-icon half"><img href="PromoIcon2"/></div>
<div class="small-text half">PromoText2</div>
<div class="footer">PromoText3</div>I create a new template with the fields needed for the rendering parameters:

This template is then added to the rendering parameters for the Promo Template

In Experience Editor, in my Promo component, I can now have access to my new rendering parameters
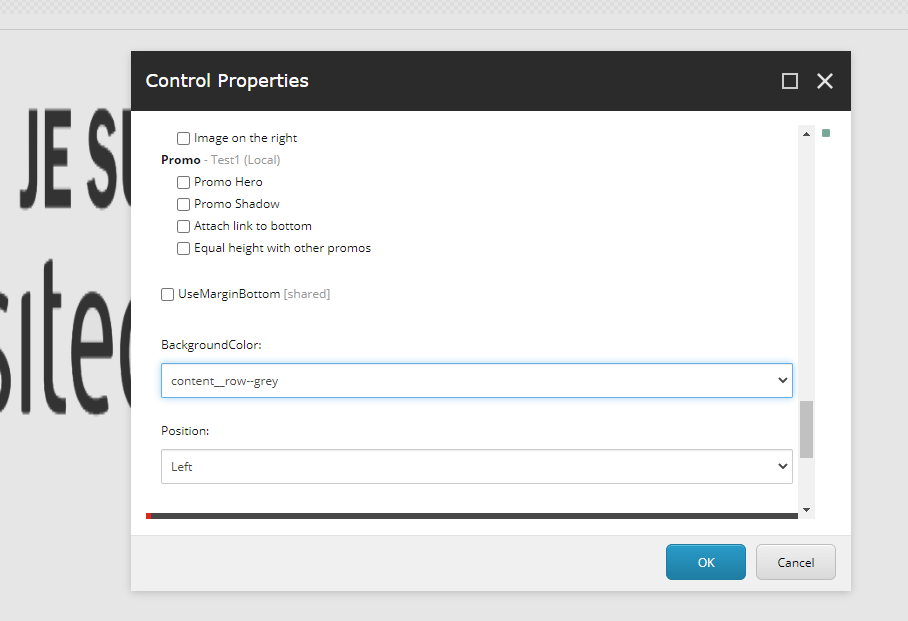
In the Scriban template, I will use Sitecore’s function sc_parameter in order to retrieve their value. Some logic will be needed in order to create the html based on the value of those parameters. Here is the final template:
{{
	classBorder = "NoBorderClass"
	if sc_parameter 'UseMarginBottom'
		classMargin = "BorderClass"
	end
	classBC = sc_parameter 'BackgroundColor'
	imagePosition = sc_parameter 'Position'
}}
{{ if imagePosition == "Left" }}
<div class="{{ classBC }} {{ classBorder }}"
    style="background-image: url(' {{ i_item.PromoIcon.media_url }}');">
<div class="promo-text">
	<div>{{ i_item.PromoText }}</div>
	<div>{{ i_item.PromoLink }}</div>
</div>
</div>
<div class="new-icon half">{{ i_item.PromoIcon2 }}</div>
<div class="small-text half">{{ i_item.PromoText2 }}</div>
<div class="footer">{{ i_item.PromoText3 }}</div>
{{ else }}
<div class="{{ classBC }} {{ classBorder }}"
    style="background-image: url(' {{ i_item.PromoIcon.media_url }}');">
<div class="promo-text">
	<div>{{ i_item.PromoText }}</div>
	<div>{{ i_item.PromoLink }}</div>
</div>
</div>
<div class="small-text half">{{ i_item.PromoText2 }}</div>
<div class="new-icon half">{{ i_item.PromoIcon2 }}</div>
<div class="footer">{{ i_item.PromoText3 }}</div>
{{ end }}
First we read the rendering parameters and save them in some variables (row 1-8). When he have a DropList, the function sc_parameters will get the value of the selected item. When we have a checkbox (row 3), the function will return a boolean if the box is checked or not. Very practical !
Based on the value of the imagePosition variable (row 9), the script will render the chosen HTML.
i_item.PromoIcon renders the whole HTML for the media item. In order to just get the URL for the media item, we ask for i_item.PromoIcon.media_url (row 11 and 22).
