
Over the years, it has often been quite difficult and time-consuming to install Sitecore Commerce. I will here show you how to install XC10 on an On-Premises computer, and how to avoid all the fallouts people usually fall into. The objective is to have a clean XC installation on a developer’s computer.
In order to demonstrate that I really have a “clean” server from the beginning, I will start with creating an Azure virtual machine.
Log in to your Azure account, and choose Add a Virtual Machine. I took an image with Windows 10 Pro, but you could also choose Windows Server 2016 or Windows Server 2019

Open only the RDP inbound port, as you will need to connect to your server with Remote Desktop.
Install SQL Server
You can choose to install any version of SQL Server 2017 or SQL Server 2019. I choose to install the EXPRESS version. Install also SSMS in order to be able to easily control what you have in the database.
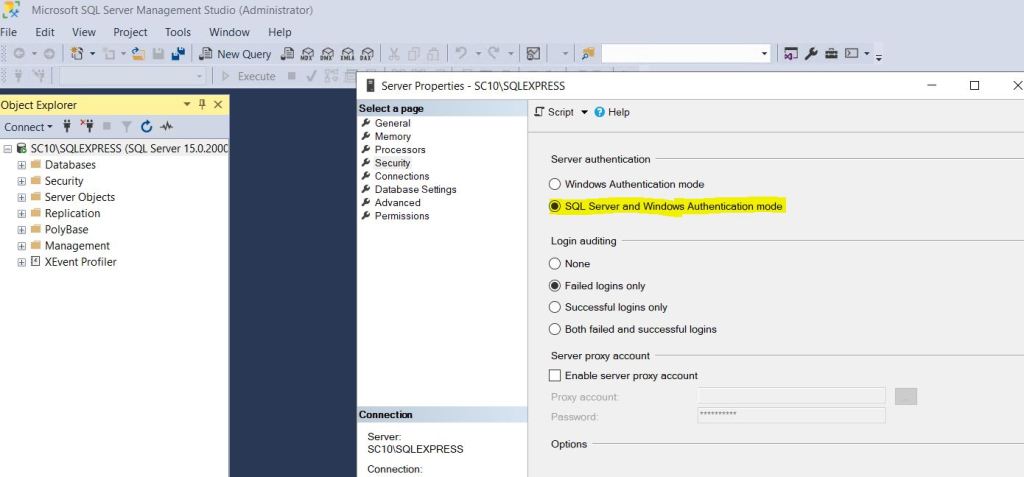
Be sure to enable the SQL Authentication in order to be able to log in with the “sa” user. In SSMS, log in first with the default Windows Authentication, and right click on your server name, select “Properties”. In the General tab, change the Server authentication to “SQL Server and Windows Authentication mode”.
Localize the sa user in Security/Logins, and double click on it. In the General tab, change the password and be sure that “Enforce password policy” is not checked.
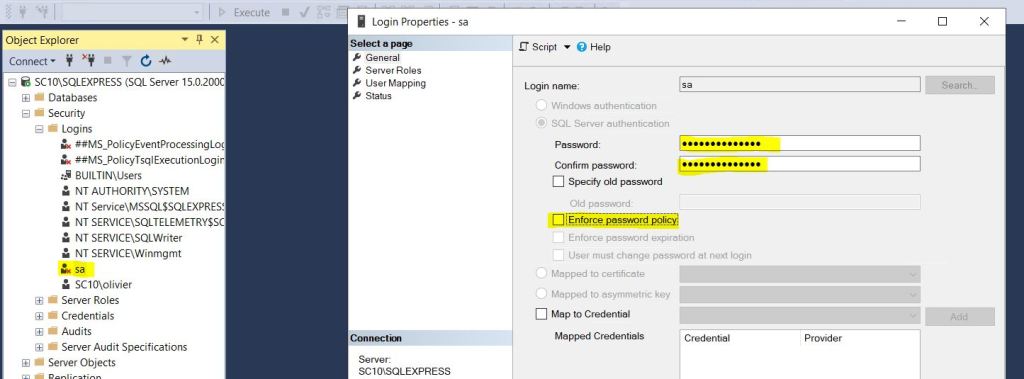
Then in the Status tab, enable this user

Save your changes by clicking the “OK” button.
These changes needs a restart for the SQL Server service. Open the services window and restart “SQL Server (SQLEXPRESS)”

Reopen SSMS and be sure you can now log in with the sa user

Install XP0 with SIA
Browse to https://dev.sitecore.net and log in with your Sitecore ID
Download Sitecore Experience Platform and unzip it to for ex c:\XP0

Execute the setup application

The setup is straightforward. You’ll install first some prerequisites and you’ll need to restart your computer.

Then you’ll install Solr and enter your Sitecore settings. If you also have an EXPRESS version of SQL Server, don’t forget to have the “\SQLExpress” suffix in database server name.

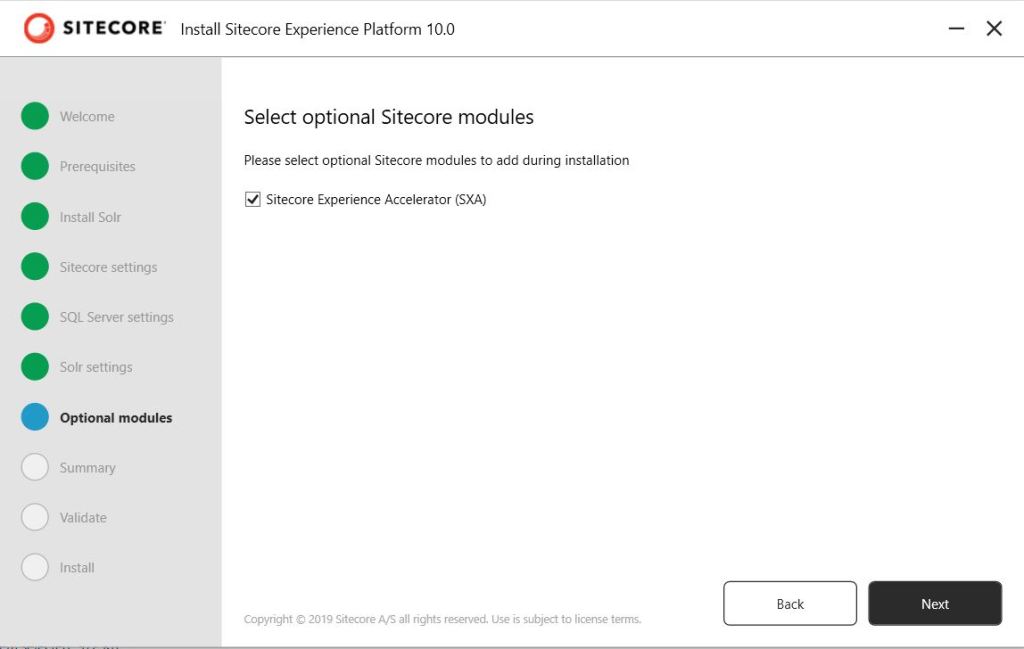
Be sure also to include the installation of the SXA module.
The installation of XP0 should be done without problem.
When it is installed, open the Sitecore admin in a browser, (https://xc10sc.dev.local/sitecore if you didn’t change anything from the default values of SIA and had “xc10” as the Sitecore instance) and rebuild Link Databases
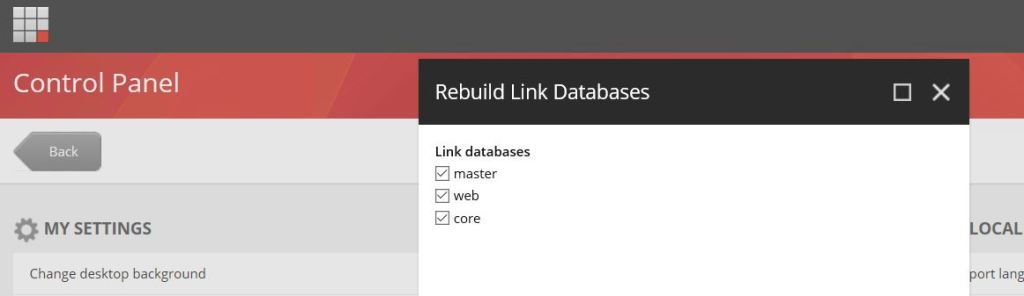
You also need to rebuild all the indexes

Prepare your XC10 installation
The following steps are really important in order to have an error-free installation of XC10. Remember that if the install script ends with an error in the middle of the installation, you’ll need most of the time to uninstall everything (XC and XP) and restart from the beginning, so make sure you have followed this check list point after point.
1- Install Redis (version 3.0.504)
2- Install .Net Framework 3.1.7
3- Install Web Deploy 3.6 (if not already installed)
4- Install URL Rewrite using Web Platform Installer (if not already installed)
5- Install .Net Core SDK 2.1.804 (Runtime 2.1.16)
6- Create an install folder, t.ex. c:\XC10
7- Download MSBuild nuget package and extract it in c:\XC10 (I use the tool 7-zip)
8- Download Sitecore Commerce 10

9- Unzip it to c:\XC10
10- Download Sitecore Experience Accelerator 10 and Powershell Extensions 6.1. Put those zip files in c:\XC10

11- Unzip SIF.Sitecore.Commerce.5.0.49 to c:\XC10\SIF.Sitecore.Commerce.5.0.49\
12- After all this, your install folder whould look like this:

13- Open the file c:\XC10\SIF.SItecore.Commerce.5.0.49\Deploy-Sitecore-Commerce.ps1 and change the parameters in order to match your installation. Here is what I have at this point:
| $SiteNamePrefix | “XC10” |
| $SiteName | “$($SiteNamePrefix)sc.dev.local” |
| $IdentityServerSiteName | “$($SiteNamePrefix)identityserver.dev.local” |
| $SitecoreIdentityServerUrl | “https://$IdentityServerSiteName“ |
| $CommerceEngineConnectClientSecret | see below |
| $InstallDir | “$($Env:SYSTEMDRIVE)\inetpub\wwwroot\$SiteName” |
| $XConnectInstallDir | “$($Env:SYSTEMDRIVE)\inetpub\wwwroot\$($SiteNamePrefix)xconnect.dev.local” |
| $SqlDbPrefix | $SiteNamePrefix |
| $SitecoreDbServer | “$($Env:COMPUTERNAME)\SQLEXPRESS” |
| $SqlUser | sa |
| $SqlPass | sa-password |
| $SitecoreDomain | “sitecore” |
| $SitecoreUsername | “admin” |
| $SitecoreUserPassword | sitecore-admin-password |
| $SolrUrl | “https://localhost:8983/solr“ |
| $SolrRoot | “$($Env:SYSTEMDRIVE)\solr\solrsolr-8.4.0” |
| $SolrService | “solrsolr-8.4.0” |
| $StorefrontIndexPrefix | $SiteNamePrefix |
| $CommerceServicesDbServer | $SitecoreDbServer |
| $BraintreeEnvironment | “sandbox” |
14- Create a Braintree sandbox and copy the Braintree information to $BraintreeMerchantId, $BraintreePublicKey and $BraintreePrivateKey.
15- Create a new file XC10Secret.ps1 with the following code:
$bytes = New-Object Byte[] 32
$rand = [System.Security.Cryptography.RandomNumberGenerator]::Create()
$rand.GetBytes($bytes)
$rand.Dispose()
$newClientSecret = [System.Convert]::ToBase64String($bytes)
Execute this program with Powershell and copy the resultat to the variable $CommerceEngineConnectClientSecret
All set ? Go !
1- Restart the identityserver site from IIS
2- Open a Powershell in Administration mode
3- Change the directory to c:\XC10\SIF.Sitecore.Commerce.5.0.49 and execute the following commands:
Set-ExecutionPolicy -Scope CurrentUser Unrestricted
.\Deploy-Sitecore-Commerce.ps1
Your installation should now go on without error.

Verify your installation
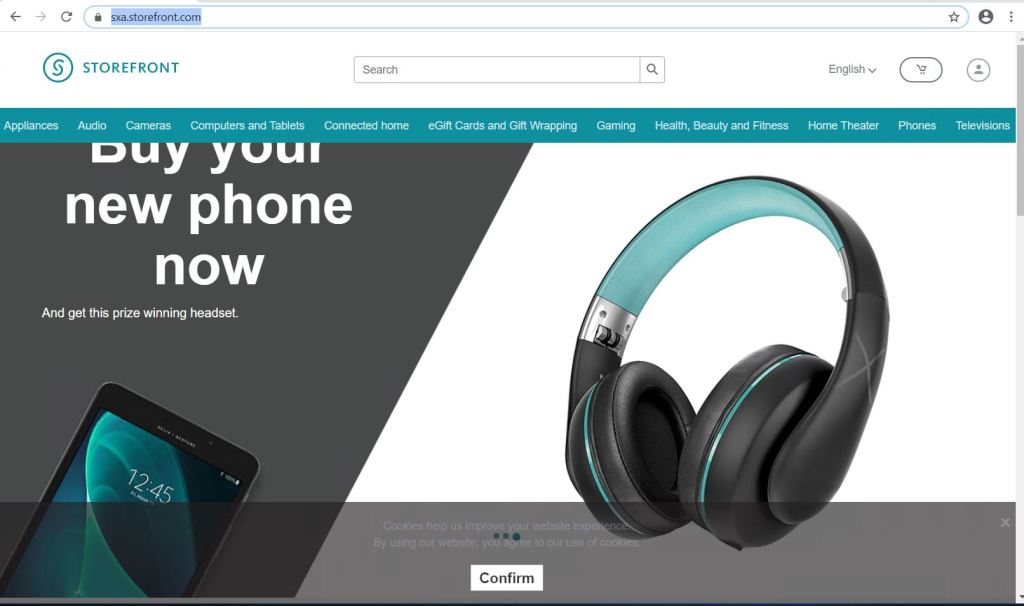
Open your SXA Storefront in a browser. When the page has loaded, you should see the first page of the SXA Storefront, with a lot of categories in the menu
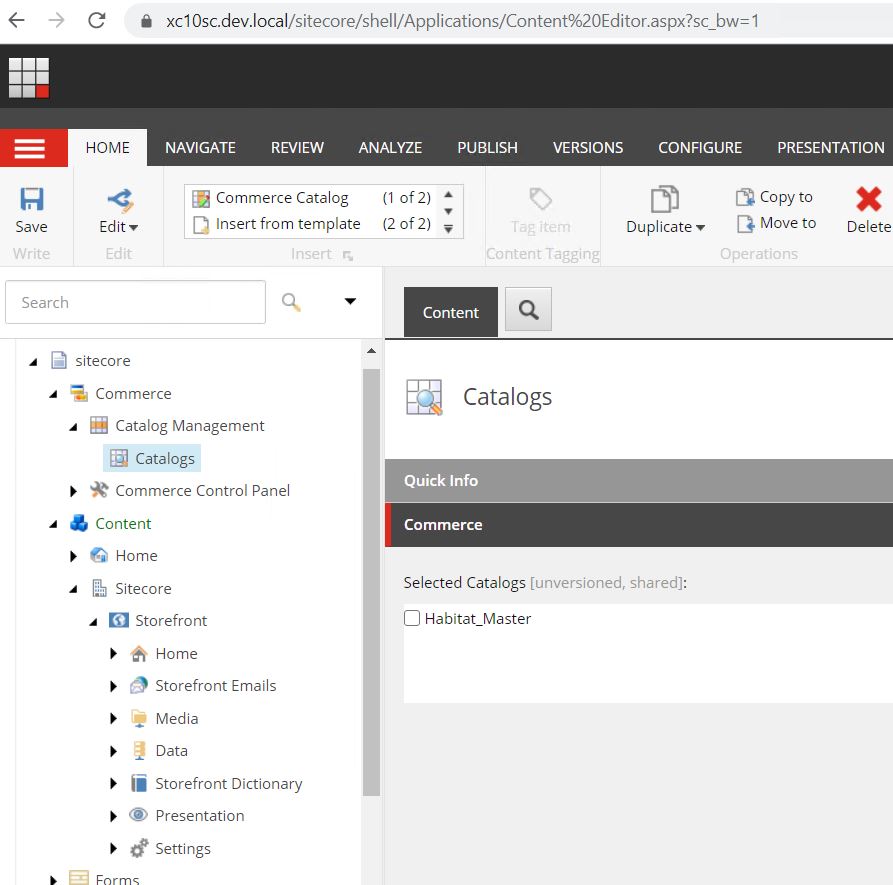
If you browse to the Content Editor in Sitecore admin, you’ll see the different Sitecore commerce items.